Sunday 6 March 2016

I'm here!

Clearly I've been having troubles keeping this blog alive... I haven't posted in a long time! I've got a long list of excuses, but instead of belaboring the point of my non-blogging, I decided it was time for an update.

This past year was a lot to handle; My job kept me busy and when I came home for the evening all I wanted to do was rest. I was also pregnant and had a baby girl in December! So my life is quite different right now. I'm on maternity leave and in between feedings and naps, I've had a lot of time to reflect on my life. I've got too many hobbies, too much stuff, and it's time to clean up my craft room (for real this time... I can't count the number of times I've said I'm getting rid of things, only to stash them in a bookshelf to 'deal with later'). I'd love to post some 'before' pictures of my craft room, which is now a shared space with my husband and all his photograph gear/bookshelves/computer stuff, but I'm actually really embarrased at how cluttered it is!

As part of my de-cluttering self-help I decided it was time to sew my fabric stash up! So I've been a little more active in the arts and crafts sales to try and get my fabric to fit into my space. I'll be at an upcoming event called The Fibre Shindig on April 16th. I was a vendor at their previous event in the fall and received a ton of positive feedback about my bags, so I decided to give it another go. My goal is to have a few more box bags and wedge bags than I had in the fall, and hopefully my fabric will be able to fit into the 3 bins in my closet (it's currently hovering around 5 bins of fabric at the moment).

I'll be selling baskets, box bags and some zippered bags to hold all your lovely items! They're great for knitting/crochet projects, but I've also stored wires & chargers when we're traveling, smaller items like underwear and socks, and lately I've been thinking about all the baby stuff I can cram into one of these for a smaller, travel-sized diaper bag! Is there something you'd love to see me make? Comment below, or send me a message via Instagram!
One of the baskets I'll have for sale


 Stay tuned for more photos of my bags, or head over to Instagram and follow me there!


Thanks for reading!
Wednesday 22 October 2014

Bunnies!

I have to say I love bunnies. I've never had a pet bunny, but I did have a stuffed animal (named Sweetiepie, from Gund) and we were best friends! Today she sits in a box somewhere (probably not the best treatment) and I have fond memories of her while I was growing up :)

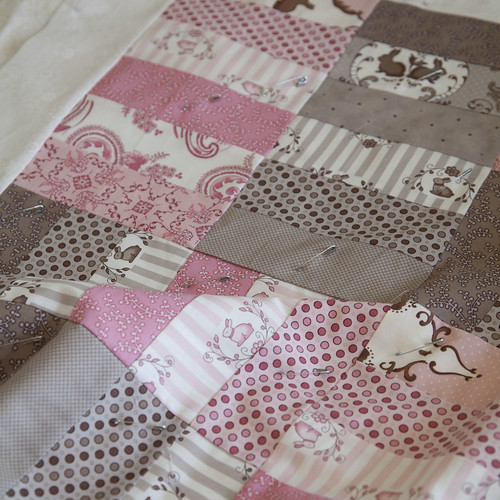
Recently, I made matching quilts for someone and the Bunny Hill print had me falling back in love with the cute critters...


custom order baby blanket

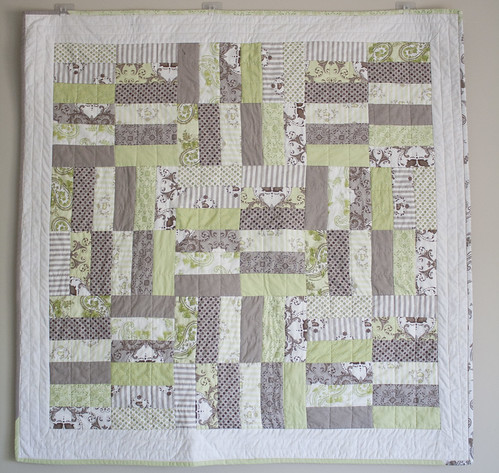
Here's another picture of another quilt, in greens and taupes:

bunny hill fabrics quilt

The prints is Windsor Lane, by Bunny Hill. It's a couple years old and it's hard to find. I know this because I searched ALL over to try and find some additional prints in this. I ended up finding them online, and at a small quilt store in Fernie BC. I bought enough for at least one more quilt but I'm focused on other projects now that Christmas is fast approaching. I love that the fabric is not too girly, or too boyish, and not too bright.

I've also knit a few of these lately...

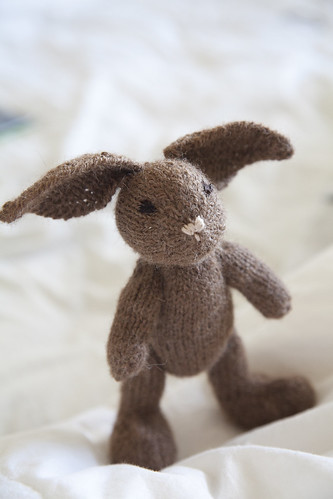
Gus

Meet Gus. I made him for my friend Zoe (her website is here) and she included him in a cute photo prop for a baby shoot a few weeks ago. He's made from some local organic alpaca I  purchased from Country Gables and it's a dream to knit with. There are more photos of him on my flickr page if you're interested in seeing a close up of his face and his backside. I'm planning on knitting a few more of these and listing them on my Etsy page, I'm aiming to get those up before Christmas so stay tuned!

I'm trying to make this a handmade Christmas, or at least partly a handmade Christmas... so I've got a lot of crafting to do!

Thanks for reading,
~C

Sunday 19 October 2014

Hitchhiker Scarf

Summers are generally slow for me in terms of sewing and knitting, but I managed to get a few things accomplished.

I made a Hitchhiker scarf (Pattern by Martina Behm). I am not usually one to buy easy patterns, but I decided to try this one out because of it's popularity on Ravelry. I was happy with my purchase- the pattern is clear and straightforward. I was in Portland a couple years ago and saw a shawl that was knit up with Shibui linen and Habu cotton at Knit Purl. I immediately fell in love with it and I knew I had to buy the yarn and make something similar. I held both yarns together and used up almost all the Shibui linen to make this scarf, which also used up close to 900m of my stash!


This was an easy, portable project and it traveled with me to Iceland and Vancouver! Here are some photos of the finished product.


I'll be posting smaller posts in the next few days and weeks on other projects and I'm hoping I can post a little more and get back into blogging. To be honest I'm not sure how I feel about blogging these days. I might shut this down all together and stick to Instagram... (to be decided!).

Sunday 7 September 2014

End of Summer

Hi!

If you look outside where you live, it's probably still hot and sunny... however I have a feeling the end of summer is nearly here for me. Just take a look at this weather forecast. Today it was 26°C, but the rest of the week is looking a little gloomy!

Does this look like summer to you?

With the weather change, I thought it would be good to have a little sale in my etsy store. Everything is currently 15% off with the coupon code Endofsummer2014. The sale is only on for 2 weeks, so take advantage of it! I'm planning on having a store update in October, stay tuned for that!


As for projects, my latest project was a sewing chair that I bought for $10 from a thrift store near my house. Here's the obligatory before-and-after shot, and if you'd like to read more about how I did this, read on!
Before (left) and After (right)
 
I found this chair in a back corner of the store, looking sad and in need of some love. I knew when I sat in it that this was the chair for me. The wood was in great shape, the lumbar back falls in the right spot on my back, chair height is idea, etc... The cushion seat needed an entire overhaul, but the wood was in great shape. 


I started by unscrewing everything, and I used a palm sander to sand off the old stain. ** If you are sanding any old furniture please wear a face mask**. Many old stains and paints contained lead, which should not be inhaled. 


When I finished sanding, I debated whether or not to keep the natural wood finish (I think this was maple but I could be mistaken)... In the end I went with a white stain. It is water-based and easy to clean up. I did two coats and sealed it up with some clear wax from Anne Sloan. 

Water-based stain


 I found some high density foam from a local fabric warehouse, and had the fabric in my stash. Usually upholstery fabric is some mix of natural and synthetic fibers but this is 100% cotton so it probably won't wear very well, and I'm ok with that because I can always change it. With the help of my husband, I was able to stretch and staple the new fabric in place. I love it, and I can't wait to start sewing!


Thanks for reading!


Monday 4 August 2014

Baby quilt... and a store update!


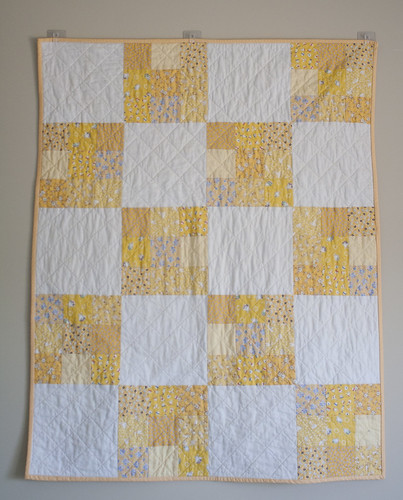
I've been sewing up some of my oldest fabric stash, and I have an amazing baby quilt to share. I like to think of it as a 'Modern Vintage" quilt, and is a mix of vintage and vintage-reproduction fabrics. I followed a simple 9-patch pattern, I think each square was 3.5'' x 3.5 '', and cut some white squares at 9.5'' x 9.5''. I alternated the squares, as you can see in the pictures below. This was a very easy  baby quilt pattern if you're looking for a quick project. The dimensions of the finished quilt is roughly 33'' x 42''. I machine-bound the binding so it would stand up to years of use.

modern vintage baby quilt- yellow

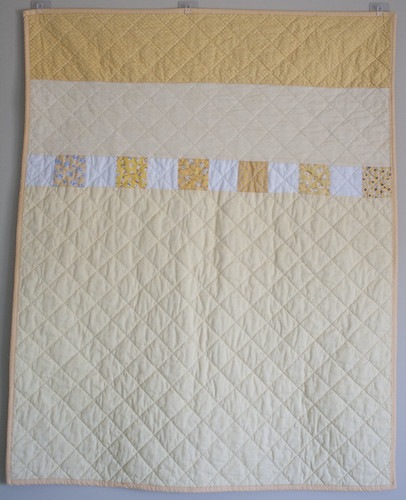
back of yellow quilt


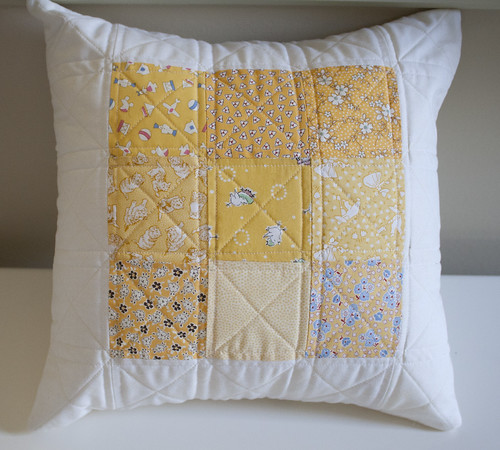
I used some leftovers for the back, and even made matching pillows. So cute! This will surely brighten any nursery!

Yellow quilted pillow


These, and some other items, are currently listed in my etsy shop, check it out!

Sunday 27 July 2014

Sew Liberated Clara Dress Pattern- Helpful tips

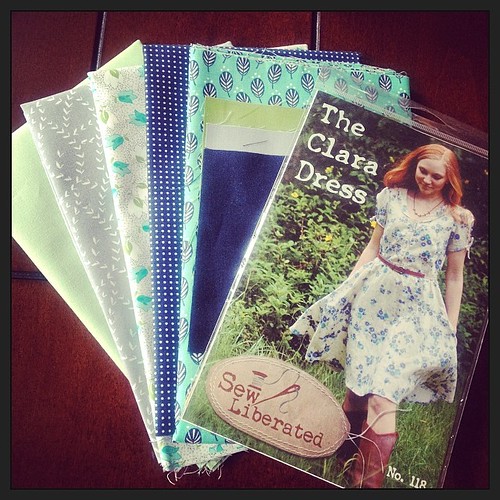
Hi! I need to tell you about this pattern, the Clara dress pattern from Sew Liberated!
 
 Got my goodies in the mail today! Thanks @goobadesigns ! #fabric #claradress #quilting #sewing
 (Pattern and fabric for another project were purchased from GoobaDesigns on Etsy)


 As soon as I saw this pattern, I knew I had to make it. I jumped right in, and didn't bother to read any more details about it online, which turned out to be a big mistake. I wish I had read some blogs before I started sewing it, and that's why I decided to blog about my helpful tips!

I used some rayon challis polka dot fabric that I picked up at a fabric sale, and it's got a lot of drape to it. Next time I would probably use a cotton blend, but I would definitely go with a drapey fabric again. I sewed up a size somewhere between a size 2-4, although I went back and altered the bodice part because it was still a little big. Anyways, I want to tell you about some issues I had, and some major learnings, which will hopefully help you if you plan to make this dress: 

1: Read the pattern, and log in to Sew Liberated's website for helpful videos on making this dress. I did manage to do that, and without it I don't think this would have turned out as well.

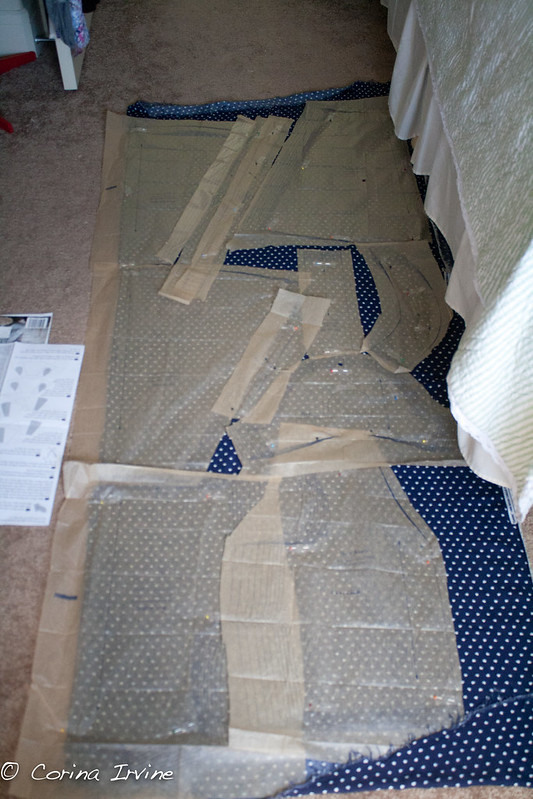
2: I didn't read properly, and missed cutting out TWO center panels, so I wasn't sure if I could even complete the dress.


However, I managed to sew the skirt pieces (with only 1 center panel), fudge around the pieces, omitted the pockets, and made a suitable bottom piece. I used the center panel as the back piece, and had a couple seams near my hips. For the skirt, I tried french seams, so the inside of the dress remained clean & string-free, and I would highly recommend doing this.

Clara Dress- cutting out pattern

3. Make sure you put interfacing in your button placket! I didn't do this and boy do I wish I had. Putting in interfacing will preserve your buttonholes over time, and give the placket a little more "oomph", especially if you're using a drapey fabric like I was. Also, I had some problems with my fabric being too slippery, especially for this button placket step, so I used some starch to keep things a little stiffer.

4. I had to shorten the body by around 2.5 inches so it would fall properly on my waist. I'm about 5 feet tall (155 cm) the pattern was probably written for someone who is ~5'6''. I used my dress form to help me decide how much to shorten by. If you don't have a dress form, just ask a friend to help you pin it to your natural waist while standing in front of a mirror.

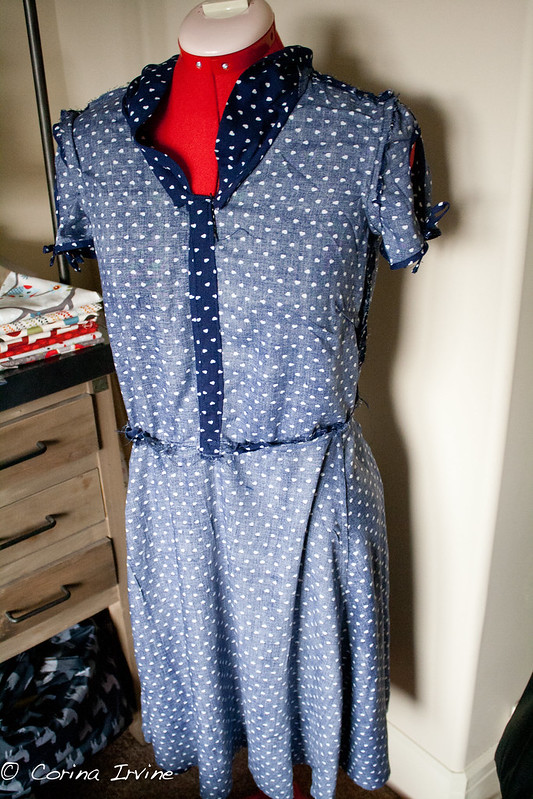
Clara Dress- Inside out

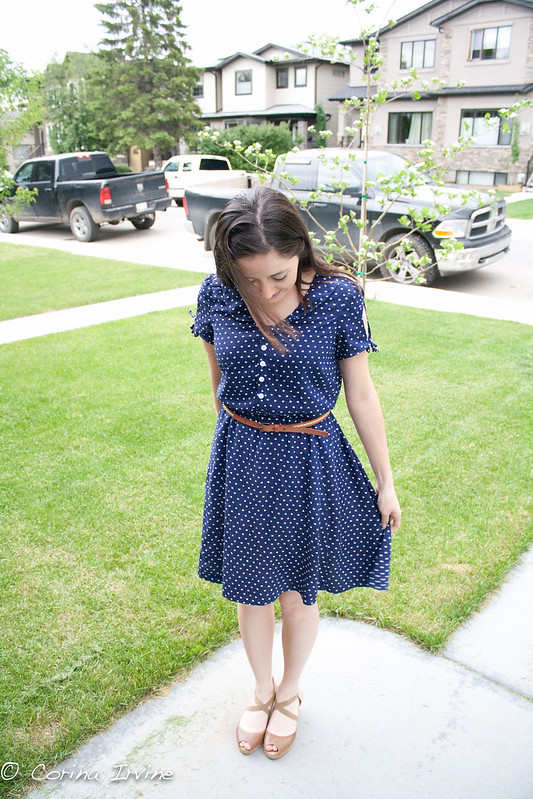
Here it is, all finished, with a thin brown belt to accessorize this dress.

Clara Dress

Saturday 17 May 2014

Makeover!

Hi!

Since spring has finally arrived, I felt it was time for a mini-makeover. It started with my Sewing room- I reorganized the furniture, cleaned up and donated some old things. Decluttering really helped with my creativity and it motivated me to make a few new things. Next up was the dreaded Computer room, a place where papers and dust collect, a random storage area for everything from exercise balls to excess furniture. I'll post some pictures when the makeovers are complete, but for now it's just bare, beige walls, with furniture we've had since university!

With all the change, I decided it was time to overhaul my blog. I've been quite busy on Instagram these days, and I've been inspired by countless blogs to make mine more streamlined. So, tell me what you think of the new layout!?  In all honesty, it's really just a background/font change, I have better things to do than teach myself how to program a website on a long weekend! Anyways, this new layout is here to stay for a while.

This is just a short post, with some obligatory project photos... behold:

This was so much fun to make, I see more of these in my future!


I can't wait to get started on this Clara dress, i've been dreaming about it for a while. I got it off etsy, from GoobaDesigns. If you haven't been to her store yet, click the link! Shipping was fast to Canada, and I was able to combine a lot of items for the same shipping cost.


Finally, I'll leave you with this English paper pieced hexagon pincushion that I made.  It's filled with walnut shells and it's amazing :)


Thanks for reading!
Corina